In the world of cybersecurity and data recovery, we often talk about “worst-case scenarios.” Usually, that involves ransomware or physical platter failure. But recently, I encountered a different kind of beast: a “Frankenstein” Hackintosh that suffered a catastrophic crash during a macOS update.
The result? A drive that refused to mount, a partition table that looked like a crime scene, and a client with 12,000 critical documents hanging in the balance.
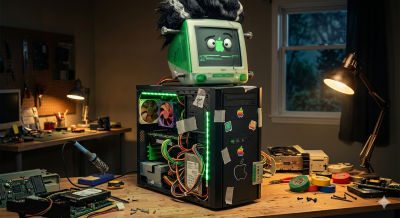
The Hardware: A UEFI Nightmare
The source machine was a custom-built rig—non-Apple hardware forced to run macOS. When the OS update failed, it didn’t just break the bootloader; it seemed to scramble how the drive reported its own geometry.
When I pulled the drive and connected it to my Dell XPS 7590 via a USB enclosure, the real fun began. Windows saw the drive as a mere 200MB EFI partition. The rest of the 1.4TB of data was invisible, a “ghost” in the machine.
The Battle of the BIOS
As an Insider Threat Analyst, I’m used to systems fighting back, but this Dell BIOS was particularly stubborn. To even attempt a recovery, I had to navigate a minefield of security features:
- BitLocker Lockouts: Since my daily driver uses Full Disk Encryption, every BIOS change (like disabling Secure Boot to run recovery tools) threatened to trigger a recovery key prompt.
- Sector Mismatches: The USB bridge chip in my enclosure was misinterpreting 4K native sectors, effectively “clipping” the drive’s capacity before the OS could even see it.
Forensics in the Trenches
I pivoted to Kali Linux via a Ventoy-booted USB. Using tools like lsblk and TestDisk, I began a deep-sector scan. The drive started throwing back bizarre metadata—at one point claiming to be an “8TB IronWolf” NAS drive despite being a 1.4TB physical disk.
This was a classic case of metadata corruption. The “Frankenstein” nature of the original build meant the partition headers were non-standard, and the failed update had left orphaned pointers across the GPT (GUID Partition Table).
The Breakthrough
After bypassing the “Security Violations” of UEFI and mounting the drive on a native Mac to eliminate the enclosure’s translation errors, I was finally able to “see” through the fog. By manually identifying the start and end sectors of the APFS container, I moved past the corrupted 200MB “wall.”
Using a combination of manual mounting and forensic carving, I hit the jackpot.
The Result: 12,000 Reasons to Smile
Despite the mismatched hardware, the failed update, and the corrupted partition table, the data itself remained intact. I was able to successfully recover:
- Over 12,000 Excel and Word documents.
- The complete file structure of the owner’s critical work.
Key Takeaways for Researchers:
- Enclosures Matter: Cheap USB bridge chips can’t always handle 4K sector translation from high-capacity or Mac-formatted drives.
- BitLocker Awareness: Always suspend BitLocker (
Suspend-BitLocker -RebootCount 0) before messing with BIOS settings for recovery. - Persist Through the “Ghosting”: Just because a drive shows as “200MB” or “Unallocated” doesn’t mean the data is gone. It usually just means the “Table of Contents” is written in a language the OS doesn’t currently speak.
Data recovery is rarely a straight line—it’s a series of pivots. This time, the pivots led to a some recovered files.
The 3-2-1 Backup Strategy: Your Safety Net
If the owner of those 12,000 documents had followed this rule, the macOS update failure would have been a 10-minute inconvenience instead of a forensic project. Here is how it works:
1. 3 Copies of Your Data
You should have your original data plus two backups. Why three? Because if you have the original and one backup, and the backup fails during the recovery of the original, you are still at 0% success.
- Original: The files on the “Frankenstein” machine.
- Backup 1: A local external drive.
- Backup 2: A secondary local or cloud-based copy.
2. 2 Different Media Types
Don’t keep all your backups on the same type of hardware. If you use two identical external hard drives from the same manufacturing batch, they might suffer from the same hardware flaw and fail at the same time.
- Examples: One on an internal SSD/HDD, one on a USB External Drive, and perhaps one on an SD card or NAS (Network Attached Storage).
3. 1 Copy Offsite
At least one backup must be physically located somewhere else. If there is a fire, flood, or theft at your office in Placentia, having three backups in the same desk drawer won’t help.
- Modern Solution: Cloud storage (OneDrive, Google Drive, Backblaze, or iCloud).
- Legacy Solution: A physical drive kept in a safe deposit box or at a relative’s house.
Pro-Tips for “Frankenstein” Systems
Because your reader is likely using non-standard hardware (Hackintosh, Linux distros, or custom builds), standard backup tools can sometimes fail. Add these specific recommendations to the post:
- Bootable Clones: Before a major OS update, use a tool like Carbon Copy Cloner or SuperDuper! to create a 1:1 bootable clone of the drive. If the update fails, you can boot from the external drive and be back at work instantly.
- Filesystem Awareness: If you are moving between Windows and Mac, format your “Data Transfer” drives as exFAT. It’s the “universal language” that both OSs speak natively without needing buggy third-party drivers.
- Verify Your Backups: A backup you haven’t tested is just a “hope.” Periodically try to open a random file from your backup drive to ensure it isn’t corrupted.
“Recovery is a triumph of skill; a backup is a triumph of discipline.”